Learning how to cut Brussels sprouts is the crucial first step many home cooks overlook. The right technique transforms them from bitter disappointments to caramelized delights. Whether you’re roasting them to candy-like sweetness or shredding them for a crisp salad, proper cutting ensures even cooking and enhances flavor by allowing heat to reach the dense core effectively. This guide will show you exactly how to turn these once-dreaded vegetables into the star of your dinner table—no more tough centers or unevenly cooked sprouts.
Choosing Fresh Brussels Sprouts
Looking for perfect Brussels sprouts is simpler than you might think! Fresh sprouts should feel firm and heavy for their size, with tightly packed, bright green leaves. Avoid any with black spots, yellowing throughout, or loose, separating leaves – these are all signs they’re past their prime.
When I’m shopping, I always give them a quick sniff test. Fresh sprouts have a clean, slightly sweet aroma, while that strong sulfurous smell means they’re breaking down and will only taste more pungent when cooked.
Size matters, too! While jumbo sprouts might catch your eye, the smaller to medium-sized ones (about 1-1.5 inches in diameter) typically offer sweeter flavor and more tender texture. Those giants often cook unevenly and can develop woody cores.
If you spot sprouts still attached to their stalk at the farmers market, grab them! They’ll stay fresh longer and often have better flavor than their pre-cut cousins.
Washing Before Cutting
You’ve picked out those perfect little green gems, and now it’s time to get them squeaky clean before they hit your cutting board. Those tightly packed leaves might look impenetrable, but they’re excellent at hiding dirt and tiny bugs you don’t want in your dinner.
The most effective approach is to trim the ends slightly (those white knobby parts), then place your sprouts in a bowl of cold water for a few minutes to give dirt time to wash away. Give them a gentle swish with your hands – almost like a little spa treatment. Working them around the bowl helps dislodge any sediment stuck between those tightly packed leaves.
After their bath, drain your Brussels sprouts in a colander and give them a final rinse under cold running water to remove any stubborn debris. A good shake helps get rid of excess water, but don’t stop there – those droplets hiding between leaves can sabotage your cooking efforts. Pat them dry with a kitchen towel, or use a salad spinner for perfectly dry sprouts.
If you’ve purchased pre-packaged, shredded Brussels sprouts labeled “thoroughly washed” or “ready to eat,” you can skip the washing step – though I sometimes give them a quick rinse anyway. Fresh, just-washed sprouts should have a clean, slightly sweet aroma that promises delicious things to come.
Related: How to Cut Broccoli
Removing Outer Leaves
Those outer Brussels sprout leaves aren’t just decorative—they’re natural armor that often bear the brunt of handling damage. While edible, they’re typically tougher and less appetizing than what’s beneath.
Almost every sprout benefits from losing at least the first layer or two. Look for wilted leaves, dark spots, or yellowing—prime candidates for removal. Fresh sprouts need minimal trimming, while refrigerated ones might require more attention.
After washing, place sprouts on a cutting board and gently peel away discolored leaves with your fingers. They should separate naturally without resistance. For stubborn leaves, use a paring knife tip to lift from the stem base.
Don’t waste these outer leaves—they make fantastic additions to vegetable stock or can be roasted separately as crispy “chips.”
Trimming the Stem
How Much to Trim
That little woody nub at the bottom of each Brussels sprout isn’t just an eyesore – it’s preventing your sprouts from reaching their full potential! Most sprouts benefit from losing about 1/8 to 1/4 inch off the bottom – just enough to remove the discolored portion while keeping leaves attached. For older sprouts, you might need to take up to 1/3 inch to reach fresher tissue.
A neat stem trim creates a flat base that helps them cook more evenly, whether you’re halving them or keeping them whole.
Why Trimming Matters
Trimming does more than improve texture – it helps sprouts cook efficiently. Dense stem ends take longer to soften than leafy parts, meaning untrimmed sprouts often end up either overcooked outside or undercooked at the core.
Plus, trimming creates a flat surface that helps sprouts sit steady for safer slicing if you’re planning to halve them afterward.
Tools for the Job
While any sharp knife works, a paring knife truly shines for this task. Its small, maneuverable blade gives you precise control as you work through a pound of sprouts.
Hold each sprout between your thumb and middle finger, stem facing up, then slice with a steady motion. Don’t toss those woody bits – they add wonderful flavor to vegetable stock or can go straight into your compost bin!
Cutting in Half
Halving Brussels sprouts creates the perfect foundation for even cooking and maximum flavor development. Place your trimmed sprout on the cutting board with the flat stem-end down to create a stable base. Hold it firmly between your thumb and forefinger, then slice straight down through the center with a sharp knife.
Key benefits of halving your Brussels sprouts:
- Creates more surface area for better caramelization and flavor development
- Significantly reduces cooking time compared to whole sprouts
- Allows seasonings to penetrate deeper into the layers
- Produces those crispy, charred edges that convert Brussels sprout skeptics
- Makes them perfect for skillet cooking with the cut-side down
- Ensures more even cooking throughout the sprout
For larger sprouts, consider quartering them for even faster cooking and crisper edges. Just remember that cut sprouts cook faster than whole ones, so adjust your timing accordingly
Quartering for Roasting
Quartering Brussels sprouts creates the perfect foundation for roasting success. After trimming and halving, make one additional lengthwise cut through each half to create four wedge-shaped pieces that deliver:
- Maximized surface area for superior caramelization and flavor development
- Significantly reduced cooking time (15-20 minutes versus 25-30 for whole sprouts)
- More crispy edges and golden-brown bits throughout
- Even cooking from the center to the edge
- Better absorption of seasonings between layers
- Perfect texture – tender inside with crispy exterior
- Ideal size for consistent fork-friendly bites
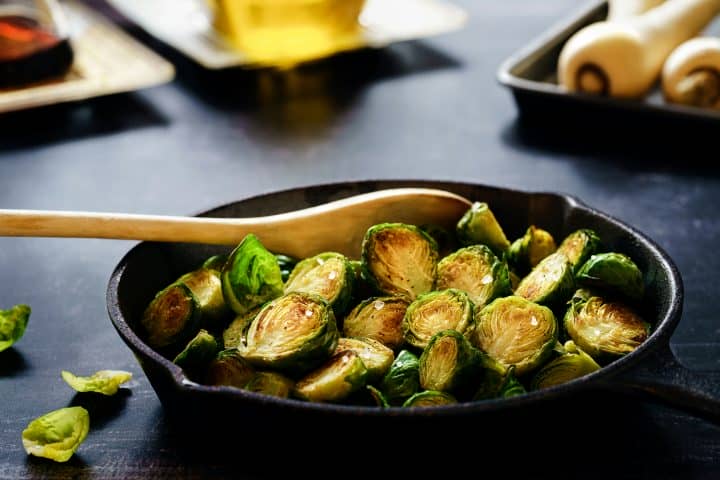
For best results, toss quartered sprouts lightly with olive oil and arrange them with cut-sides down on your roasting pan, giving them plenty of space. A 425°F oven transforms them quickly into golden perfection. Try adding garlic and red pepper flakes before roasting, or a drizzle of maple syrup in the final minutes for a sweet-savory glaze. Finish with a splash of acid like lemon juice or balsamic vinegar to brighten the caramelized flavors and elevate this simple vegetable to star status.
Thinly Slicing or Shaving
Transforming Brussels sprouts into delicate shavings opens up a world of raw salads and quick-cooking slaws that highlight their subtle sweetness. Whether you’re making a crisp side dish or adding texture to a winter grain bowl, thinly sliced sprouts absorb dressings beautifully while maintaining their nutritional value.
- A sharp chef’s knife provides the most control—place trimmed sprouts cut-side down and slice as thinly as possible across the entire sprout
- Mandolines create the most consistent paper-thin slices, perfect for raw applications—always use the handguard to protect your fingers from the razor-sharp blade
- Food processors fitted with slicing discs (not shredding discs) can process a pound of sprouts in under a minute—ideal for larger batches
- Freshly shaved sprouts develop a more complex flavor than pre-packaged options and maintain better texture in both raw and cooked applications
- Store any unused shaved sprouts in an airtight container with a paper towel to absorb moisture, keeping them crisp for 2-3 days
Related: How to Cut Mushrooms Like a Pro
Final Tips
- Store cut Brussels sprouts in an airtight container with a paper towel in the crisper drawer – they’ll stay fresh for up to two days.
- For maximum flavor, trim stems and remove outer leaves ahead of time, but save halving or quartering until just before cooking.
- Raw, shaved sprouts are best prepared the same day – they oxidize quickly and lose their vibrant color and sweet flavor.
- Remember that cutting affects cooking time dramatically – quarters cook in just 15 minutes while whole sprouts might need 25 minutes.
- Each cutting method serves a specific purpose: whole for slow-roasting, halves for most applications, quarters for maximum crispiness, and shavings for raw salads.
- For quick weeknight cooking, slice sprouts for stir-fries – they cook faster and catch sauce between their layers.
- Start checking doneness earlier than you think necessary – nothing ruins Brussels sprouts faster than overcooking them
Your Guide to Perfect Brussels
Perfect Brussels sprouts start with smart selection—choose firm, bright green ones while avoiding black spots or yellowing. Clean thoroughly, remove tough outer leaves, and trim stems just enough to create a flat base. Your cutting method matters: halve for even cooking, quarter for maximum crispiness, or shave thinly for fresh salads. Store properly and never overcook. With these simple techniques, you’ll transform these nutritional powerhouses into caramelized, flavor-packed dishes that will convert even the most stubborn sprout skeptics.